|
| © 2020 David Hurst All Rights Reserved |
It was at the Halifax 2019 model railway show that I was tempted by an old Hornby “Smoky Joe” style 0-4-0 engine sitting in one of the second-hand boxes. I had seen some ideas on YouTube about add simple cylinders and coupling rods to these which looked convincing when completed. Little did I think it would lead me into an interest in a new scale of 7mm.
It was some weeks later when I came round to see what I could do with the old Hornby chassis, my first thoughts were the type of engine I could build from the existing bodywork. I found a very good source of inspiration at the Smallbrook Studios web site. They do resin body conversions for the 00 chassis in a 7mm scale, there is also a good catalog of rolling stock and detailed parts.
I found one saddle tank conversion from a Hornby “Thomas The Tank Engine” Bill Loco just what I liked. I look on eBay and was lucky enough to find a body for the Bachmman version of the Bill engine. My plan was to scratch build a new cab and smokebox door, then buy a cast resin dome and water tank lid. Other details I could get from various other sources.
My next thoughts were on the cylinder conversion, I looked up the You Tube video I had seen previously. The parts used on that were spares form a Hornby Class 28XX 2-8-0 Loco Valve gear, I got a set of these from Peters Spares. Only the crossheads and slide bars would be needed for this job so the other bits would be saved for something in the future. To attach the crossheads and the coupling rods I required some very small 14BA machine screws nuts and washers, and eBay came up with a suitable supplier of these.
I would need to build some simple cylinders to fit onto the existing chassis, and remove the existing moulded ones. To do this I laminated together a couple of Placticard blocks and a bridge between them to form a cylinder arrangement. Holes were drilled to give a clearance fit to the crossheads and a tight fit for the slid bars. The chassis was cut to allow the cylinders to sit in the correct place.
The next job was to alter the coupling rods, these needed to be cut in front of the dummy cross heads, and a clearance hole made in the centre of the rod for the 14BA screws. Once done the screws can be passed through from the back of the coupling rods, a washer placed between them and the crosshead, then a couple of nuts used on the outside of the crossheads will lock them in place. It all needs to be a loose fit to work. Once all is fitted together a quick test run will let you know if any adjustments are required for smooth running.
Once the chassis was running, I started thinking, could I 3D print a version of the cylinders and crossheads. So off I went to the computer and came up with a version that used 0.7mm brass wire for the slide rods and cylinder rod. I used White Versatile Plastic to create the prototype print and after a couple of attempts, I got them working. So I added these to the loco I was building.
 |
| © 2020 David Hurst All Rights Reserved |
There came a point when I had to add the Bachmman body to the Hornby chassis, This was not a straight forward fit, but with a little cutting and a bit of Milliput Putty, it went together. By removing some plastic from the bottom of the footplate around the front and rear couplings and infilling a small section to the front of the footplate, where an 8 BA nut could be bonded to the underside. The chassis in turn needed a slot cutting at the back to allow it to fit the rear bodywork. A hole was drilled through the front of the chassis in the centre of the cylinder bridge to allow an 8 BA screw to pass through, this is to hold the chassis and body together. NEM Coupling pockets were fitted in place encased in Milliput putty at both ends of the chassis,
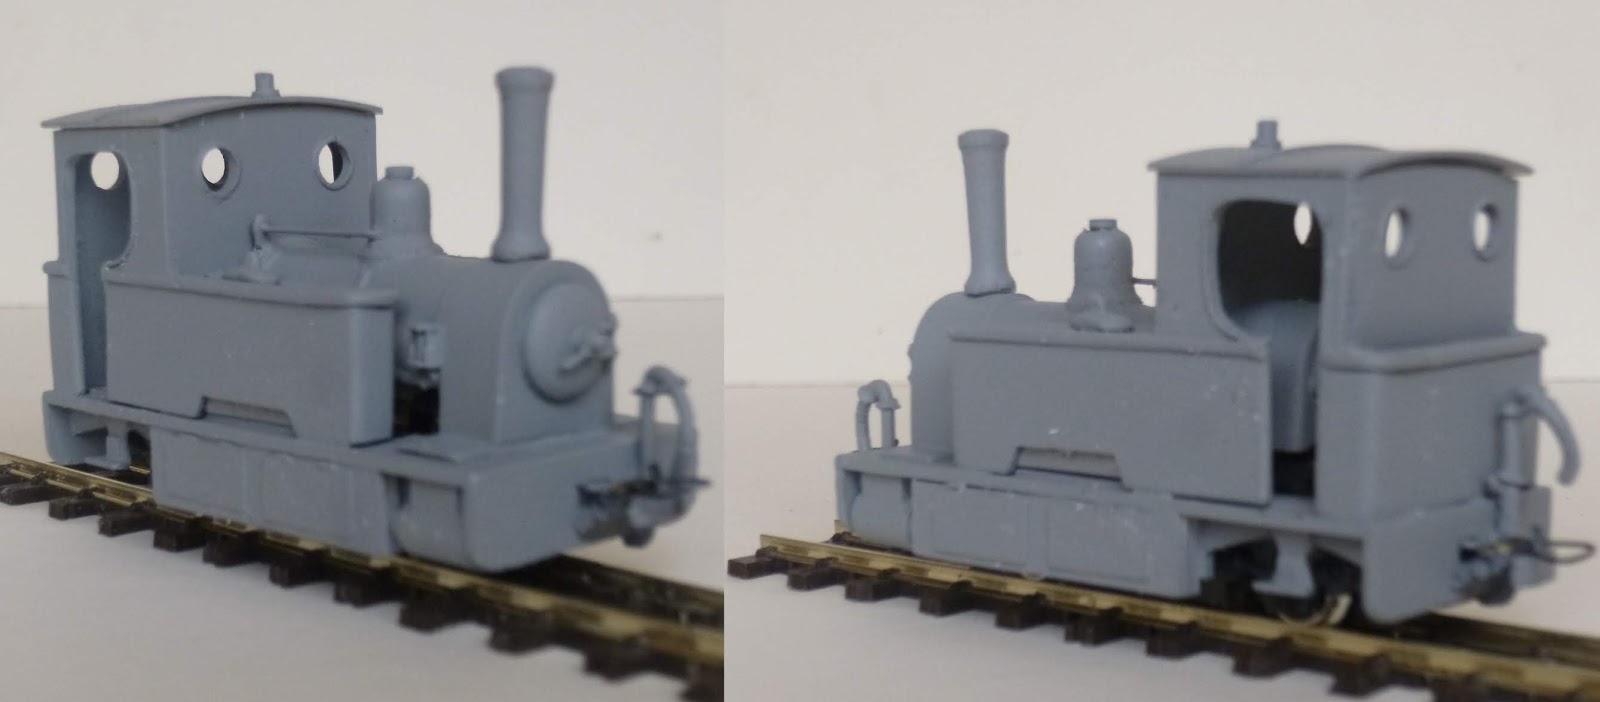
Once I had completed the scratch-built body the natural progression was to see if I could produce a 3D printed version of a body. The only thing to decide what engine to have a go with. In the end, I worked on two types the Skylark style and Peckett style engines which I had already done in 009. These were scaled up and reworked around the new chassis. The idea being, to create a body shell with the cylinders already attached. These could be used as simple conversion to the Hornby chassis by removing the cylinders and couplings from the Hornby chassis, then the chassis would simply push into place under the new body.
 |
| © 2020 David Hurst All Rights Reserved |
If you wanted to go further you removed the cylinders from the printed body also and add the additional printed cylinder block and crossheads to the chassis to create a more detailed version of the engine. They would also have pockets in the buffer beams to accommodate NEM coupling pockets at the correct height. Well, it all seemed like a good idea.
 |
| © 2020 David Hurst All Rights Reserved |
 |
| © 2020 David Hurst All Rights Reserved |
I had two prototype prints done in White Versatile Plastic to try these out, they both fitted the chassis as expected and work well as simple conversions.
I have also done a third body now, this one is a quarry Hunslet style with a cap that can be built in three versions, one open, one with no back, and a fully enclosed version. I just could not make my mind up which I liked best.
I Have now added a Sharp Stewart Tattoo Saddel tank to the ranks of the 0 gauge fleet of small engines. It is printed with some alternative parts such as funnels. This one is designed to run on the 0-6-0 Electrotren chassis with the rear wheels swaped for a 10mm solid disk type to form a pony wheel.
 |
| © 2022 Tom Waddell All Rights Reserved |
© 2022 David Hurst All Rights Reserved
I have added a list of additional fitting that I used and the supplier below. The three printed bodies and cylinders conversion are available on Shapeways at:
https://www.shapeways.com/shops/model-engine-works?section=0-

16.5+Engines&s=0
List of Parts:
Hornby 0-4-0 Chassis or Electrotren 0-6-0 Chassis
Printed or scratch-built chassis blocks
Brass 0.7mm brass wires
Parts from Peters Spares
Hornby X8834W Class 28XX 2-8-0 Loco Valve Gear Set Weathered.
Couplings and NEM pockets
8BA Screws nuts and washers
14 BA screws nuts and washers
© 2020 David Hurst All Rights Reserved