Showing posts with label tram coach. Show all posts

Sunday, 14 April 2024

009 Tram Shelter

 2024 David Hurst All Rights Reserved

On the bus route to work from Huddersfield to Elland, I kept noticing a very unusual bus shelter. It stuck in my mind because it looked so ornate and out of place. On one of my journeys in 2020 I walked to the bus stop just to have a closer look and I was not disappointed. It is a fantastic little building, built of wood and painted in cream and red with a grey slate roof and lots of little details. Before my bus came I did a quick measure and took lots of photos. It was a much more interesting wait for a bus than normal that day.

 2024 David Hurst All Rights Reserved

I did a little research into the history of the building. It was built by the Huddersfield Corporation Tramways in 1896, which was the first local-authority-run tramway service in England and was built to the unusual gauge of 4 ft 7 3⁄4 in to attract traffic from neighbouring coal tramways. The shelter was presumably repurposed in 1934, upon the conversion of the Linley and Outlane line to trolleybus. The entire Huddersfield network was converted over the 1930s (the tram network officially closed on Saturday 29th June 1940), and was itself replaced - and the shelter once again repurposed - when the trolleybus network was superseded by buses in 1968. Unfortunately, as with most of our very nice Victorian infrastructure, the shelter became unnoticed, unfashionable, and neglected, despite being Grade II listed in 1977. Its fortunes changed in recent times: in 2015, the West Yorkshire Passenger Transport Executive applied to restore the shelter to its former condition and H.C.T. colours of vermilion and cream. This is why I had noticed it. I have since found out that the shelter once had a central coal stove and the roof apex once had a chimney, not the finial that nicely finishes off the restored roof.


Fast forward to December 2023. I had just got a new 3D filament printer and was looking for something interesting to challenge both the machine and my drawing skills when I remembered the shelter. It had a good level of detail and an interesting shape. So off I went and disappeared for several hours doing the drawing. I then had the new dark art of “slicing” software to navigate before unleashing it on the printer.

The results surprised me. They were good, not perfect, but a good basis to work with to create a model with a level of detail at a 4mm scale. I wondered if I could go smaller so tried a 3 mm scale and then 2.53mm TT120. They both worked but with some of the finer window details removed as the printer's 0.4 mm nozzle and 0.1mm layer thickness was just not fine enough. Also at the two smaller scales, the details are just not that visible.

2024 David Hurst All Rights Reserved

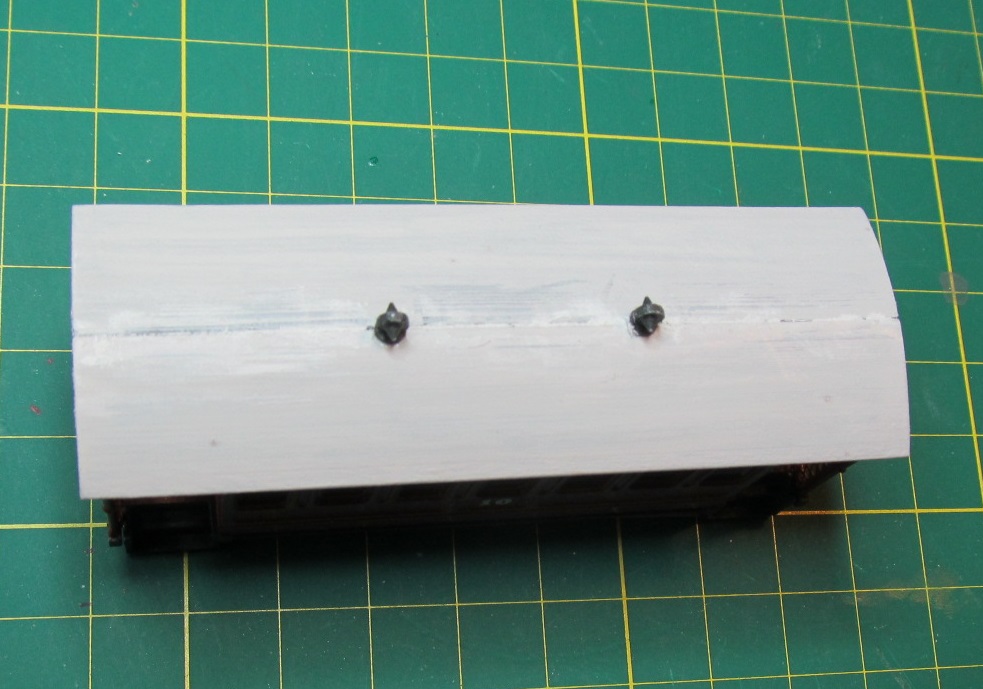
The 4mm scale version I did in three sections: the roof, walls, and floor. It worked well for printing and allowed the interior to be accessed for painting. For the smaller scales, I just did the roof and walls, though I am sure a floor will print with the floorboard details.

© 2024 David Hurst All Rights Reserved

There was a little bit of cleaning up to do around the windows, and also the underside of any overhangs are challenging to get smooth on the printer. I have found that small needle files are a very good tool to smooth things out in these areas. Printing on a fine setting does give a good finish to the model and although there are areas with some fine lines these are not difficult to overcome. When preparing the model for painting I used a spray matt primer in either white or grey then gloss spray lacquer, which has the effect of levelling the surface. I applied two or three coats of each and this gave me a smooth surface to paint on.

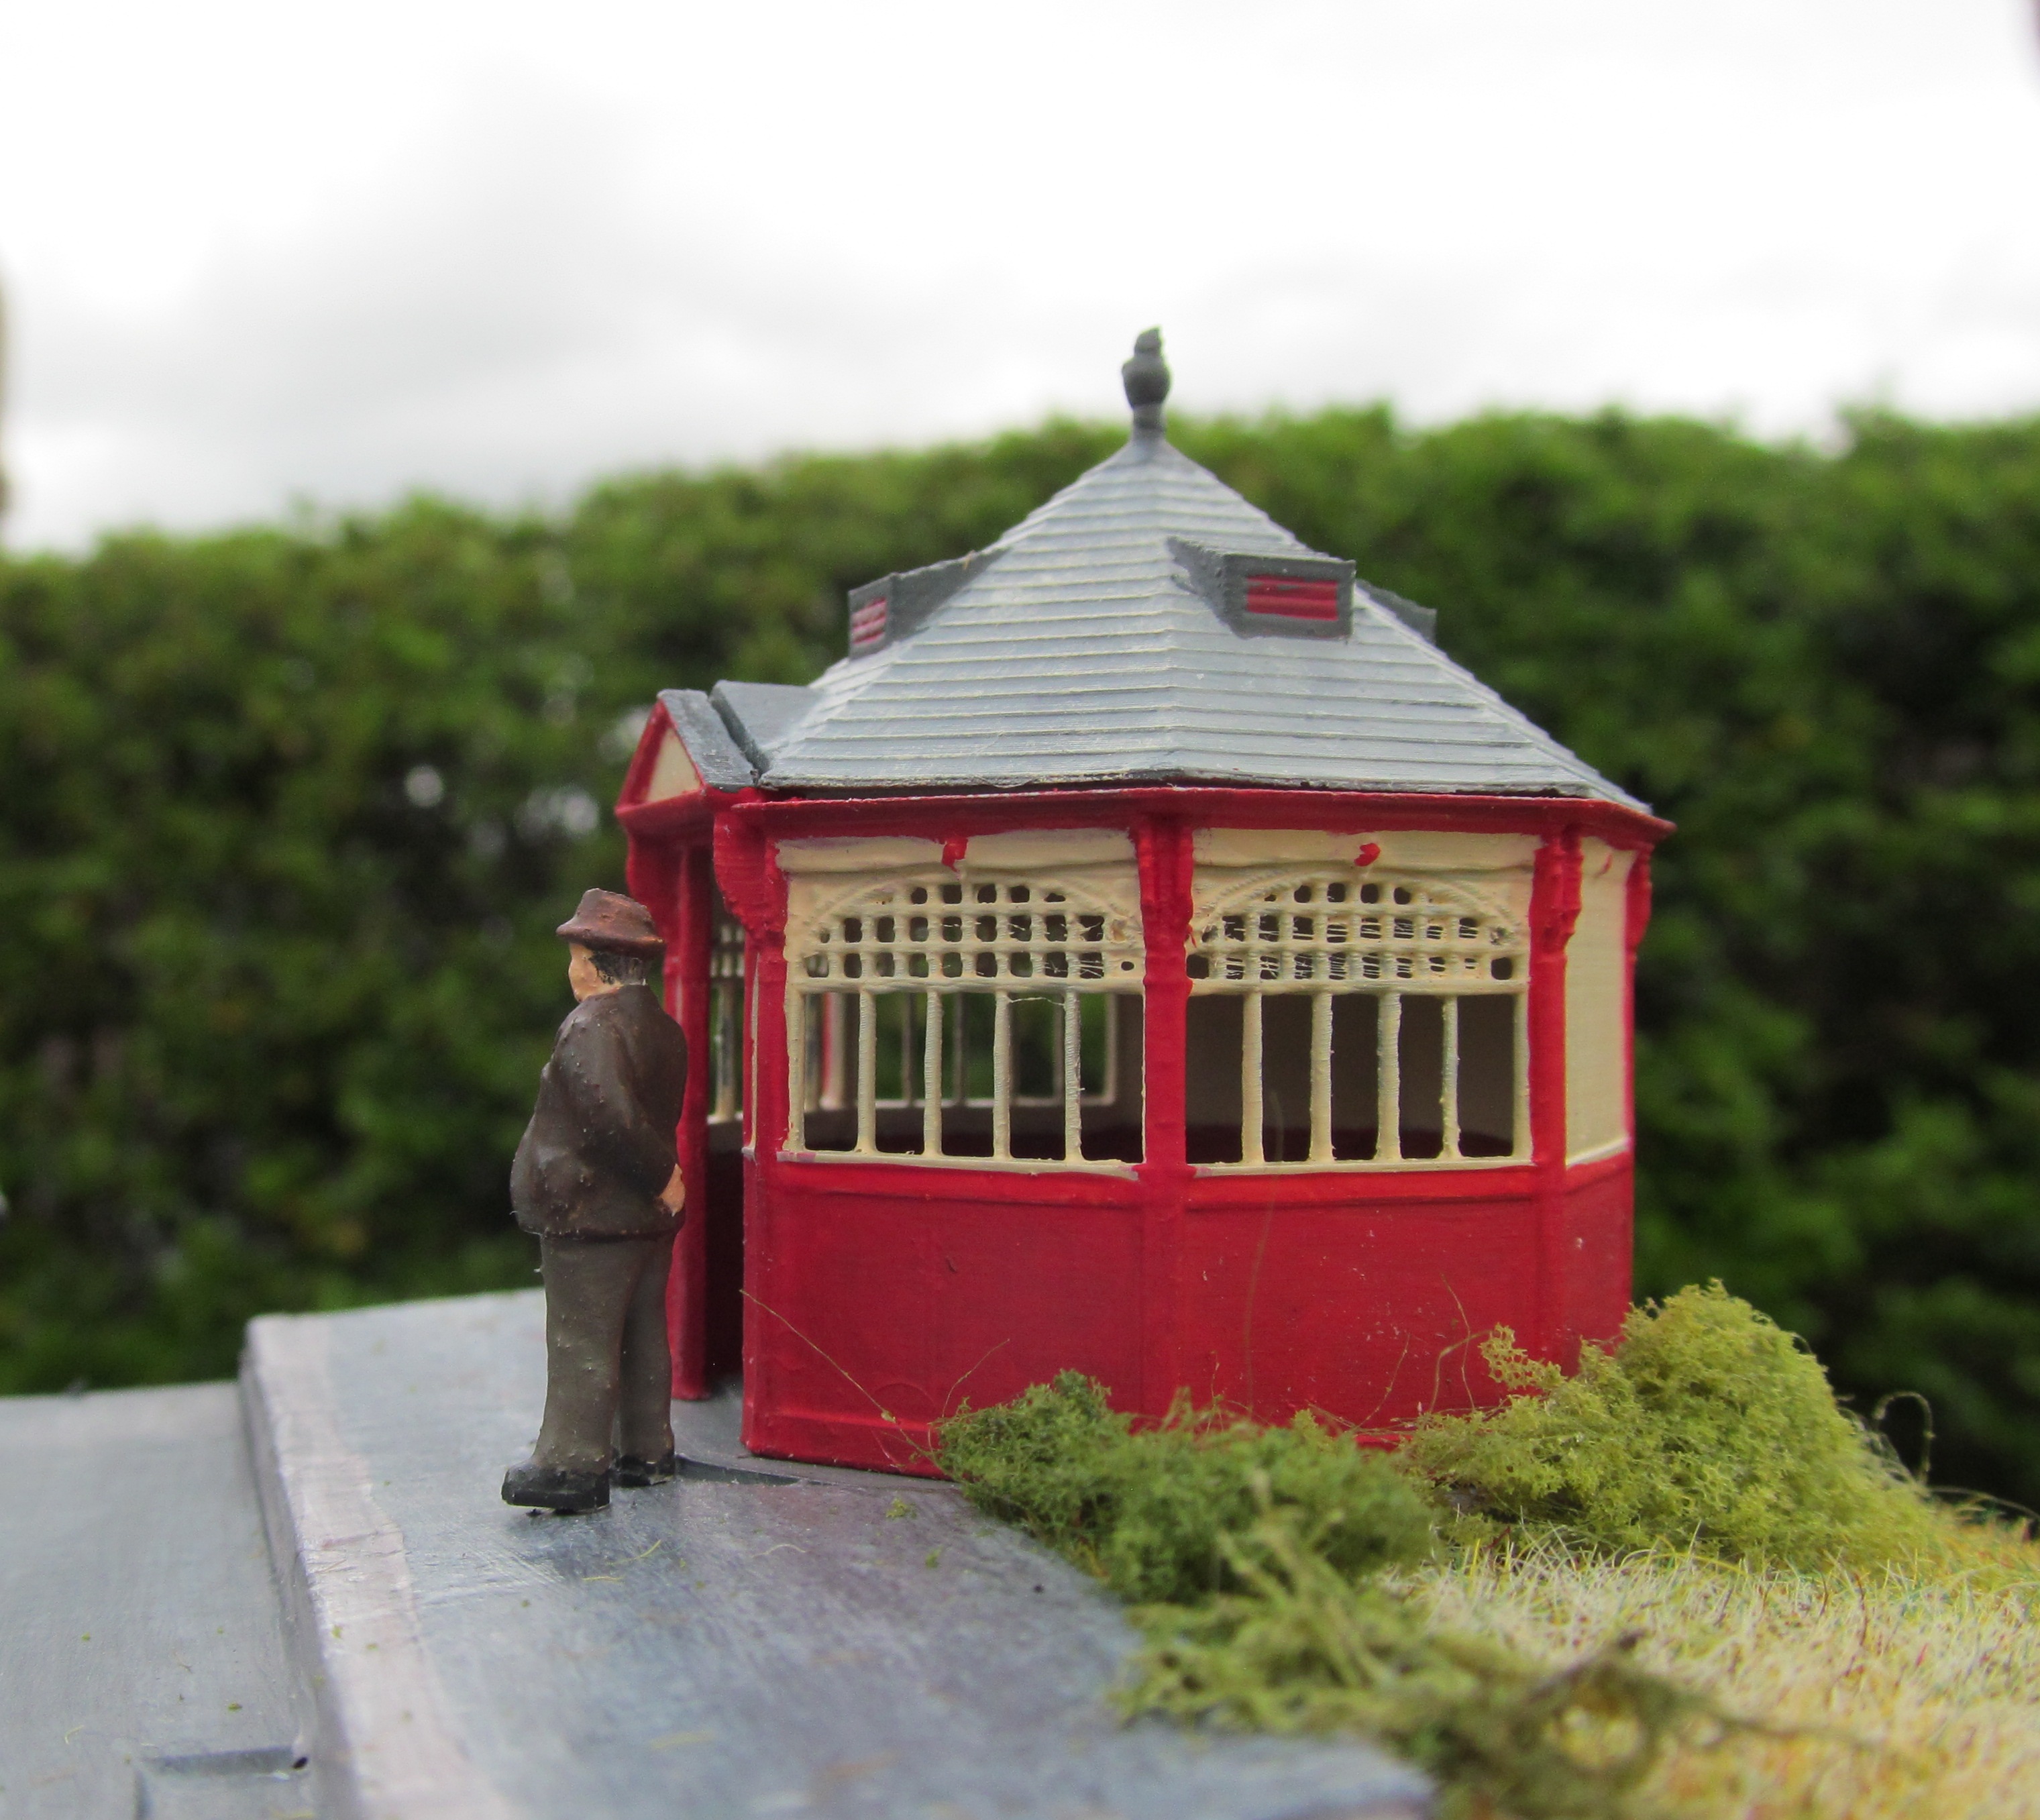
Painting the first model I used Vallejo acrylic paints, each thinned with a little thinner medium and applied in multiple thin coats and washes to highlight shading. I decided to try and go with the current colours of the shelter and used a mix of 70.926 Red and 70.947 Dark Vermillion on the lower panelling and details, 70.837 Sand on the windows and upper details, 70.826 Black Grey on the roof and floor concrete base. This was mixed with 70.951 White to create a light grey for the concrete base and a mid-grey for the roof tiles. It was also used to dry brush over the roof area. The floor was based out with a light grey and then a black wash to get between the boards and finally dry brushed with the sand. For any areas with lead flashing, I mixed a bit of the black grey with some 70.997 silver to give it a metallic grey look.

© 2024 David Hurst All Rights Reserved

It has been an enjoyable venture into the world of home printing my own models and learning a new skill, and though it is not to be compared with commercial printing such as Shapeways, it has a place for those of us who like the challenge of trying something ourselves. I picked a filament printer as it uses less messy materials and takes up less work space than resin printing, so would do for me at this time. Things are changing fast though, so that will change I am sure.

© 2024 David Hurst All Rights Reserved

Based on the original panels which I have drawn in a modular fashion, there are some variants of the original shelter also - these include a hexagon smaller version a double-fronted rectangular type and two-handed smaller rectangular versions. 


If you like the model and would like your own copy please get in touch with me at modelengineworks@outlook.com and I will do my best to help.


Sunday, 6 November 2022

009 Chiemsee-Bahn Style Steam Tram

© 2022 David Hurst All Rights Reserved

Following on the theme of the steam trams I had a look at European types and found some really good candidates to suit the new Kato-Peco Small England chassis, one stood out for me, the meter gauge Chiemsee-Bahn tram looked a perfect match for the chassis.

© 2022 David Hurst All Rights Reserved


The Chiemsee-Bahn (Chiemsee Railway) is a meter gauge line in Prien am Chiemsee, Germany. It is one of the world's last steam tramways and is said to be the oldest continuously operated steam tramway in regular operation.

It has worked out as a very compact model, and as such, I have ended up adding the couplings to the buffer plates and not using the Peco coupling pockets which I would normally use. It is a superb running model and I think my favorite tram from my ever-growing collection.


© 2022 David Hurst All Rights Reserved

To allow for fitting details inside the very small space in the cab that is left after accommodating the chassis and the large weight. I have made the whole of the upper cab including the roof and supports separate from the lower body. This has allowed me to fit a figure with its lower half removed. I used one of the Dapol trackside work crew. It also makes it possible to add pipework and controls if you like.

© 2022 David Hurst All Rights Reserved

There is a bit of deviation from the original tram around the smoke box door, this was purely for the structural stability of the roof supports and to locate the upper and lower sections. The smoke box door is printed as a separate part, I used a dart from RT models.

© 2022 David Hurst All Rights Reserved

The handrails have small pilot holes formed to give a guide for drilling out to suit the wire used. My choice was 0.45mm brass. There are three small lamps added with the print, two for the front of the tram and one for the rear, I added some clear and red rhinestones to form the lenses on these. There are holes in the front of the bodywork for the lamps, but you can decide if you want to fit the rear one and where to position it.

© 2022 David Hurst All Rights Reserved

One of my modifications on the prototype was to abandon the NEM pockets and to fit a set of RT models Penryhn Locomotive couplings, as space is a premium inside the lower bodywork. I have added a similar printed pair to the model on Shapeways now also some location holes on the buffer beams.

© 2022 David Hurst All Rights Reserved

Finishing the model was done in oil-based enamels, the black was Revell M09 Anthracite and the green was a mix, not as bright as the original. The roof was left in the grey primer. The lining used is Fox Transfers cream 0.35mm, and this is sealed with a matt varnish.

© 2022 David Hurst All Rights Reserved

It goes well with a small tram coach which I converted from an Atlas tram model obtained on eBay.This started out as a Berlin tram in a 1:86 scale which I added a 4mm section between the footplate and the bodywork to raise its height and give it the height to look like a 4mm scale model. Under the footplate I used a Peco wagon frame split in half to extend the wheelbase and some etched brass mesh to form side guards to the chassis. The foot plate being of metal gives it enough weight. Because of using the Peco wagon frame, I was able to fix Peco NEM pockets and couplings directly under the footplate. With the paintwork being superb on the Atlas models I decided to keep it untouched, the additional section that I added was painted in a contrasting darker green and the footplate was lined in red.

© 2022 David Hurst All Rights Reserved

I have made this model available on Shapeways if you would like a copy of the print. see the link below.

009 Chiemsee-Bahn Steam Tram (649WKSZ4H) by tdhurst (shapeways.com)


Sunday, 24 January 2021

009 Atlas Tram and Coach Conversion


© 2021 David Hurst All Rights Reserved

There is a really nicely modelled Atlas Editions Bern steam tram and coach out on sale at the minute, which with a little careful conversion makes a very detailed steam tram engine and coach set for 009 modellers. The main additions are a Kato 11-110 chassis to motorise the
steam tram engine and a set of Peco G-106 bogies. There are also a set of Peco GR-103 NEM pockets and some 1mm Plasticard to form some new interface parts to put it all together. The good thing about this is, if done carefully no intricate painting would be needed to get a really detailed pair of models.

The main difficulty with this conversion is the dismantling of the two models. I found that some parts were glued together more affectivity than others. This can cause some breakages as the plastic used is quite delicate. I found that the worst areas were the railings on both the tram and coach, which broke in several places.

© 2021 David Hurst All Rights Reserved

I will start with the coach as that is the simplest and a good starting point to get a feel of the conversion. I removed the wheels, dummy bogies and couplings. The metal used to form the floor of the coach is quite soft and can be cut with a razor saw. The couplings are held on two small metal tabs under the end beams. These need to be cut off in line with the underside of the floor.

© 2021 David Hurst All Rights Reserved

The steps are formed in quite thick plastic and to allow enough swing on the couplings it is a good idea to reduce these on the backside, and soften the inner edges. I ended up having to re-fix one of these as it was not glued on well.


© 2021 David Hurst All Rights Reserved

To fit the bogies, I created a new subfloor in 1mm plasticard which fitted between the steps and the break gear in the centre of the coach. I left the original threaded lugs used to fix the coach to the display base in place and drilled two holes in the new base to allow for these. The other two lugs to fix the dummy bogies in place I had to remove. This was done by drilling, using progressively larger drills. Once at the bottom face of the floor I formed a countersink to allow clearance for the free moment of the new bogies.

To mount the Peco G-106 bogies all that is needed is a hole of the correct size, and they will just clip in place. These were formed by drilling a clearance hole larger than the bogies require in the subfloor. A packer is then made to sit below this which has a smaller hole suited to the bogie's clips. This needs to be fairly small and inbound of the wheels which need to swing freely. I glued this in place under the hole in the subfloor, lining it up the two holes, which formed a small rebate above the hole in the packer.

The bogies were adapted to suit the steps, by using a set of the Peco GR-103 NEM coupling pockets and cutting these and refitting them to form a long bar type mount instead of the moulded L shaped arrangement. I then glued this to the opposite end of the bogie to the existing NEM pocket. By doing this it had a long enough reach to work with the steps. It was then just a case of fitting my preferred coupling in place.

© 2021 David Hurst All Rights Reserved

With this arrangement the coach should be able to negotiate track curves around 200 to 230mm (8 to 9”) and it is a really nicely detailed coach.

The steam tram takes a little more work to dismantle it. The boiler, funnel and pipework are all glued in place then fitted to the base which has to be removed at the bottom, and the side railings are very awkward to get off without breakage. In the end, I removed the roof and windows above the waistline. This allowed me much better access to the bits, but I still had to carefully break the funnel off the boiler. I carefully saved all the bits for re-assembly later, then using the existing base as a template I marked a piece of 1mm plasticard with its shape. I then marked some centre lines on the new base and added a template of the Kato 11-110 cut out.

© 2021 David Hurst All Rights Reserved

Once this is cut out and fits in place OK, some stops to position it is needed on the front and back of the cab. It sits 1mm below the original base and there are a couple of ridges on the ends of the bodywork which gives you a good guide to position the stops. A new floor needs adding above the chassis to make it easier to fit the boiler and pipework back in place. This needs to be a fraction smaller than the original base and is supported on a couple of strips fitted to each side, which are about 5mm wide so the whole floor will be raised up by 6mm. The boiler will need to be reduced by this 6mm also. This is just about level with the existing body sides so does not look much different from the original arrangement.

© 2021 David Hurst All Rights Reserved


The one item I could nor repair was the side railings, they were just too brittle small and fiddly to work
with. A new pair of railings were made from brass wire soldered together. To make these easier to assemble I formed notches in the 1.5mm poles to allow the 0.7mm handrails to sit in, which were all held in place by Blue tack on a cutting mat, then soldered in place.


© 2021 David Hurst All Rights Reserved


Removing the roof first makes the fitting of the internal pieces much easier. I assembled it dry then painted the floor and fitted everything back in place before putting it in the body. The railings I had reformed in brass wire and painted silver before adding to the body. This meant that there were four poles to locate in the holes on the underside of the roof and the funnel to glue back in place with the cab ends.

The couplings are a bit tricky to fit, I decided to add NEM coupling pockets. These need a hole making in the correct place, so I sat the body on the chassis and lined up the coach bogie with the skirts to mark the hole position, drilled a hole and filed it out to suit. The pockets can then be pushed in from the back and glued in place.

© 2021 David Hurst All Rights Reserved

The body is a little lightweight with the original base removed, so a couple of strips of lead were added to the new floor and also a bit in the boiler for good measure, which seemed to make a difference.

© 2021 David Hurst All Rights Reserved

It makes a really nicely detailed set, and the steam tram goes well with other bits of rolling stock.


Sunday, 12 August 2018

009 K.P. Tramcars


©  2018   David Hurst     All  Rights Reserved 

009 K.P. Tramcars

These are what might have been “tramcars”. One is a vertical boiler style steam tramcar, based on an Atkinson Walker steam wagon, combined with a generic electric tramcar, the other a generic double ended electric style tramcar which can be seen in many locations worldwide and can also be used as a dummy car or coach. The tram may have been used on some of the smaller country or seaside tram lines, which were looking for an economical passenger or mixed traffic tractor around the turn of the 19th century.

Both tramcars have been designed to use the Kato 11-104 chassis with some modification. The roof is removable to allow interior details to be added, and they also have some detailed parts printed with the model. These include a representation of a vertical boiler whistle, funnel cap, (K.P. steam tram only), running lamps, and a pair of couplings (on both trams).


©  2018   David Hurst     All  Rights Reserved 

The coach or dummy car which can be used as an electric tram or a small coach to pull along behind the K.P. steam tramcar or a suitable engine can run on the Kato 11-104 chassis or a dummy free wheeler chassis.  
   
Cleaning and priming
If you have a print in Smooth Fine Detail Plastic it is advisable to soak in petroleum spirits (paint thinners/cleaner). This is to remove the oil based wax support residue left from printing. Next wash in warm soapy water and allow to fully dry which should leave the surface ready for painting. I use a grey or white spray primer to prep the model for finishing,  but in some areas it will be necessary to remove print lines from the surface, and this can be done with a burnishing tool. I use a hardwood stick with a rounded point to get in the tight spaces.


©  2018   David Hurst     All  Rights Reserved 

Wirework

There is not a great amount of wirework on these models, just the hand rails each side of the cab door openings and at the passenger’s entrance. For this I have used 0.45 mm brass wire, and drilled out the pilot holes to suit. The cab handrails are formed as four U shaped pieces which I pushed through the pre-drilled holes from the outside and fixed with Cyanoacrylate glue (super glue). The passenger’s entrance has one U shaped piece and one full height pole fitted between the floor and roof. This can be fitted when the roof is fixed in place.


©  2018   David Hurst     All  Rights Reserved 

Fitting the chassis & ballast

The Kato chassis will need to be cut down to fit, the coupling mounts need to be cut off each end and the axel boxes will need to be removed from the sides. I have added two small lead weights at each end of the chassis glued in place, also some strips of lead inside the cabin to each side of the chassis opening. This has been enough ballast to give the model good electrical pick up and traction. 

Couplings

A Pair of printed couplings are supplied with these models. They are printed under the footplate, along with the other small detail parts such as the work lamps.


©  2018   David Hurst     All  Rights Reserved 

Glazing
For the windows I have used thin acetate saved from old packaging; this is glued with Cyanoacrylate glue (super glue). It is great if you have curved or awkward shaped glazing  as the acetate being thin and flexible can be persuaded to take on a curve by passing it between a smooth round surface like a screw driver shaft and your thumb. I fit the glazing when building the model and then fix it in place in the final stages after the painting is completed and before the roof is fitted. Any weathering is done after the glazing is completed.  
 

Interior details

The K.P. steam tram has a vertical boiler; water tanks, feed pipes and gauge printed within the passenger cabin. This will need removing and then details such as wheel valves and additional pipework can be added. This type of small tram is likely to have had side benches for passenger seating, so figures adjusted to suit the internal floor level can be added with their backs to the windows to represent passengers.       


©  2018   David Hurst     All  Rights Reserved 
    
Painting

After initial preparation of the model it was given a couple of light coats of matt grey primer, then burnished and smoothed, with a final coat of primer to finish off.  As there is no prototype to guide us with this model, I chose to do the footplate, roof and handrails, in a charcoal grey Revel No 09. I dry brushed a little silver round the mechanical parts under the footplate which highlights the details; also some gloss varnish gives the impression of oil on these areas. The body on these models have been done in yellow cream at window level and a dark blue below. The impression of rust was added to some areas of the footplate, buffer beams and running gear with a dry brushed application of Revel Matt No 37 and No 85.    

The final little bit of detail was to add the work lamps and lenses. For these I used 3mm Clear Rhinestones, fitted after painting was completed..
I finished over all areas with a coat of matt varnish. I then added weathering with powdered wax pastels, using mixes of orange, brown and black, to give the tram an overall weathered and well- used appearance.  


©  2018   David Hurst     All  Rights Reserved 


©  2018   David Hurst     All  Rights Reserved 

©  2018   David Hurst     All  Rights Reserved 


If you would like a copy of this model it is available on Shapeways at Model Engine Works:


Friday, 22 December 2017

009 Tram Coach


Additional notes added August 2019


©  2017   David Hurst     All  Rights Reserved
This is a small tram-style coach based on the Clogher Valley Railways coaches but without the clerestory roof.
The original Clogher Valley coaches were built in 1886 by The Metropolitan Railway Carriage and Wagon Co of Birmingham. There were 13 passenger coaches in total, numbers 7-9 bogie 1st class which were shorter than the others, 10 & 11 bogie 1st / 3rd composite, 12 – 19 bogie 3rd. All the coaches had balconies at each end, which supported the overhanging clerestory style roof. Communication between each coach was possible across metal fall-plates which covered the buffer-couplings. The carriages were innovative in using exhaust steam to provide heat to their passengers, at a time when the best most people could expect in winter was a warming pan. The coaches remained in service till the lines closure on New Year’s Day 1942.  

©  2017   David Hurst     All  Rights Reserved
The print configuration in two halves cuts down the amount of support material by a considerable amount and therefore the cost. It still allows for the fitting of internal details and glazing before the coach is assembled. It is also much easier to add details such as the etched mesh to the balcony end frames from the inside before they are added to the main coachwork.
Because of the detailed panel-work on these coaches they are only available to print in Frosted Ultra Detail, this does mean that the balcony end frames are quite delicate and I have found that they may warp in transit. Fixing them into position on the model does push them back into their correct shape, but be gentle as this is done.

©  2017   David Hurst     All  Rights Reserved
 I have found it a good move to keep all of the print in one piece while you remove the waxy residue, wash and prime the print. I used a mid-grey spray primer and, once dry, the etched mesh was added to the balcony ends. I had a small diamond etch that I had bought at a local railway exhibition, which I cut down to suit the small end frames at each side of the balconies. These were fixed on the inside of the balcony using Cyanoacrylate glue (super glue). A final coat of primer was sprayed over the whole print and allowed to dry. 

©  2017   David Hurst     All  Rights Reserved

I decided to use a pair of Kato 11-099 bogies on this coach as they have an offset pivot, are small well engineered and have a free running wheel sets. The offset pivot on the bogie was particularly useful as it allowed the pivot on the floor of the coach to be close to the balcony steps without the bogie being restricted by them. This does mean that they are the wrong way round, the couplings facing inward, and should be removed. I felt that this would not be of any detriment as the coach    itself is short, and normal fixed coupling should cope on restricted curves. I did find that the pivot formed by the printer can vary in the thickness. This stops the free movement of the bogie from side to side. I used a small flat file to dress off some access material at the base of the pivot on the coach, which will allow the pivot clips on the bogie to engage on the inside of the pivot hole on the bottom of the coach and allow it to turn freely.   
My choice of finish was a Revel oil based paint ref SM 331 thinned slightly and I applied two coats of this to the sides, ends and the balcony ends. The frames and steps had a coat of dark grey Revel mat 9, the fall plates were a mix of the matt 9 and a silver to create a dark gunmetal finish. A wood colour mix was used on the balcony floors, and on the roof I used a Revel light grey matt 43 and white 5 mix. I left the inside of the coach in the light grey primer finish as this is pretty neutral.

©  2017   David Hurst     All  Rights Reserved
After the painting was completed, the glazing could be added with a sheet of clear acetate cut to suit the side windows, then glued in place with Cyanoacrylate glue (super glue). I found it simplest to position the glazing panels and then drop some glue on the edges, this would then run under the acetate and fix it in place. Apply a little light pressure while the glue is going off.
©  2017   David Hurst     All  Rights Reserved
When you are assembling the coach the central roof joint will be the most obvious and this can be tackled in a few ways. One is to fill the joint after fixing the coach together and painting over the joint. Another method is to use a single lamination of toilet tissue paper to represent a felt roof covering: fill the roof joint, apply glue over the whole roof, then add the paper from the centre line letting the glue soak in as it is applied. Once the result has dried this can be painted, possibly in a dark grey to mimic the felt colour. The two roof ventilators are then added and finished in with the roof colouring.    
Numbers were added to each side of this particular coach. The central panel was used to display the number 10, the three panels under the windows being a good area to display numbering or lettering. Any style of around 1 to 2mm size will look fine.  I used the Fox Transfers FG1003 - Alphabet in white - Franklin Heavy, 2mm & 1mm which give a nice bold graphic.

©  2017   David Hurst     All  Rights Reserved
Once fully assembled – couplings added, glazing and painting fully completed- a coat of thinned matt or satin varnish was applied to all painted areas of the model. This helps to fix the transfers and pull the whole finish together. It is a bit of a personal choice, but I do like to add a measure of weathering to the final model. It removes that out- of- the box look. To do this I use artist’s oil pastels which have been made into a powder form. Black, burnt senna (earth/mid brown), light red and orange are the main colour pallet that I use.  It is also quite easy to mix these to create other shades. They are dusted on the model with a number 6 size paint brush that is kept specifically for this job. If you don’t like what you have done it can be cleaned off again, which is what I like about using oil pastel dust to do the weathering.   
©  2017   David Hurst     All  Rights Reserved
If you would like a copy of this model visit Model Engine Works at:

Additional notes added August 2019

Further variants of this style of coach are available from the Model Engine Works Shop on Shapeways. Both are slightly smaller and more economical to build. One comes with a clerestory roof like the original Clogher Valley coaches. The other has no roof printed, allowing you to supply your own. They both have window openers which can be positioned as you require. Roof vents are also supplied to add the finishing touch to the roof.

©  2019   David Hurst     All  Rights Reserved

©  2019   David Hurst     All  Rights Reserved

Further items will be need to complete the models, these include wagon chassis such as the Peco N" gauge chassis kits (Ref NR122 0r NR123) from Dundas Models. A set of couplings and acetate or clear Plasticard for glazing the windows.

©  2019   David Hurst     All  Rights Reserved


If you would like a copy of this model visit Model Engine Works at: