
 |
| © 2020 David Hurst All Rights Reserved |
It
was quite by accident that I came upon a 1930s railbus photograph
while searching for something else on the internet. I liked the 1930s
aero styling and the design looked perfect to adapt to a narrow gauge
variant. The original Waddington V8 railbus was designed as a feeder
vehicle for the main railway lines in Sidney during the 1930s,
running on standard gauge lines.
 |
| © 2020 David Hurst All Rights Reserved |
The result of the drawing is a 3D printed version, which is printed as one piece to be split into the roof and upper body, and lower body. This can be printed in White Versatile Plastic or Fine Detailed Plastic with the addition of brass wire to form handrails. Couplings could be added to the model, but I have not added any to this version.

I had a sample printed by Shapeways in Fine Detailed Plastic. When this arrived I soaked it in Petroleum organic solvent – paint thinners (“White Spirits” in the UK) in order to remove the wax support residue left from printing. I then washed it in warm soapy water to leave the surface ready for painting when fully dried. I use a grey or white spray primer to prep the model for finishing. In some areas, it will be necessary to remove print lines from the surface, and this can be done with a burnishing tool - I use a hardwood stick with a rounded point to get in the tight spaces. Do these processes before separating the print into its component parts so you will be less likely to lose any of the small pieces.
 |
| © 2020 David Hurst All Rights Reserved |
Wirework and details
The next job was to add the handrails to the door which is on the righthand side of the vehicle only. I obtained this from a supplier on eBay. The handrails were formed as small staples bent with pliers to the right size and fitted into the pilot holes supplied in the model. The handrails were fitted but not glued in place at this point in the construction process.
 |
| © 2020 David Hurst All Rights Reserved |
The
glazing was formed by making card templates of the windows and then
transferring this to clear acetate, which I usually recycle from
packaging. It is best to paint the model before adding the glazing
material and gluing in place.
 |
| © 2020 David Hurst All Rights Reserved |
The model has been designed to run on the new Kato 11-110 chassis, which are a welcome improvement on the later version of the 11-104 that they replace, having more weight, different gearing, a brass flywheel, and much smoother electric motor. They fit within a similar opening as the original. They do not need as much ballast to run well, but adding some is a good idea for traction. I used small strips of lead fitted along the inside of the bodywork, as low as possible to keep the models balanced right.
As mentioned, I did not use coupling on this version of the model, but if a small slot were made in the front bumper and above the rear bumper Greenwich or similar couplings could be used.
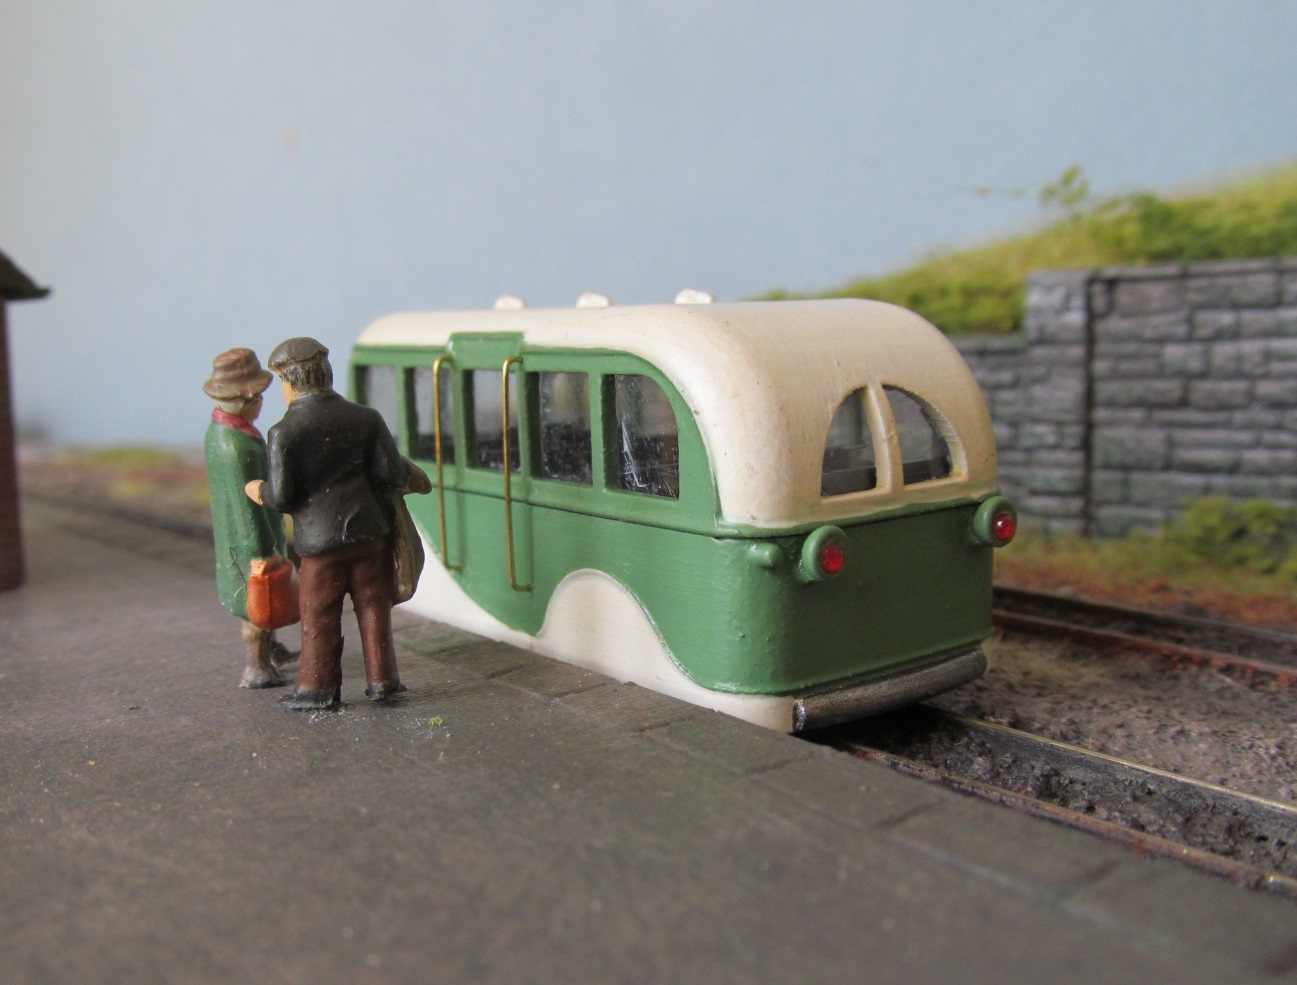
Painting and finishing
Once all the additional bits and details were added and before glazing the model, I gave the model a final coat of grey spray primer and made sure all was ready for the final paint finish. For this model, I used some Humbrol enamels. These were a mixed pale green and an off white. Some details such as the window frames and bumpers were picked out in a silver enamel paint. I applied a coat of matt enamel varnish to the whole surface of the model.
 |
| © 2020 David Hurst All Rights Reserved |
The final job was to add the glazing in place to the inside of the upper bodywork. Once this was complete the bodywork was glued together and the handrails added and glued in place.
I used Cyanoacrylate (super) glue to fix these components together.
 |
| © 2020 David Hurst All Rights Reserved |
If
you would like a 3D print of this model visit Shapeways at: