|
© 2018 David Hurst All Rights Reserved
|
This is a small
industrial loco based on the one used at the Guinness Brewery in Dublin.
It is now an exhibit at the Ulster Folk and Transport Museum which is situated
in Cultra near Belfast.
My idea was
to find a small to medium size industrial loco with an interesting look about it,
I wanted a compact design where the cab was low enough to be used for both
industrial and mining purposes. The one used at the Guinness Brewery in Dublin
fitted this model very well, being designed to be used within the tight
clearances around the Brewery complex in Dublin.
The other good point about
this engine was that it was no plain Jane; it had a good level of detail both
under the footplate and around the bodywork. This is very good for adapting the
design to suit a particular chassis. With the small size and narrow wheel base
of this engine I have looked at using the Tomy-tec H1 chassis. It has turned
out slightly larger than I planned, more on the medium size, but looks as if it
is man enough to do most types of industrial haulage jobs.
© 2018 David
Hurst All Rights Reserved
|
The model is
printed in separate parts: the footplate, (which could be the basis of a
different model) the body, the roof and the radiator. There are also smaller
details printed within the body and footplate, including an exhaust system crash bars, work lamp, brake
handle, and cab seat. Some generic couplings are also included, but other types
can be used also.
The Tomy Tec
HM-01 chassis I have used needed to have its footplate reduced in width so I
dismantled the chassis and cut the footplate down. This is much easier to do
and a neater job is achieved. It all just clips back together again.
© 2018 David
Hurst All Rights Reserved
|
Because of the
engines size and the level of detail it is only suitable to print in the Fine
Detailed Plastic.
 |
© 2018 David
Hurst All Rights Reserved
|
|
When using the
Find Detailed Plastic form Shapeways the first thing I do before removing any
of the parts is the soak the print in a paint remover / petroleum sprits (white sprits in the UK). This is to remove the wax support
residue left from printing, and then a wash in warm soapy water should leave
the surface ready for painting after it is fully dried.
 |
© 2018 David
Hurst All Rights Reserved
|
|
I use a grey or
white spray primer to prep the model for finishing. In some areas it will be
necessary to remove print lines from the surface. These sometimes only show up
after the primer is applied and can be removed with a burnishing tool. I use a hardwood stick with a rounded point to
get in the tight spaces. Further light coats of the primer will give a good
working surface on which to apply the finishing coats of paint .
 |
© 2018 David
Hurst All Rights Reserved
|
|
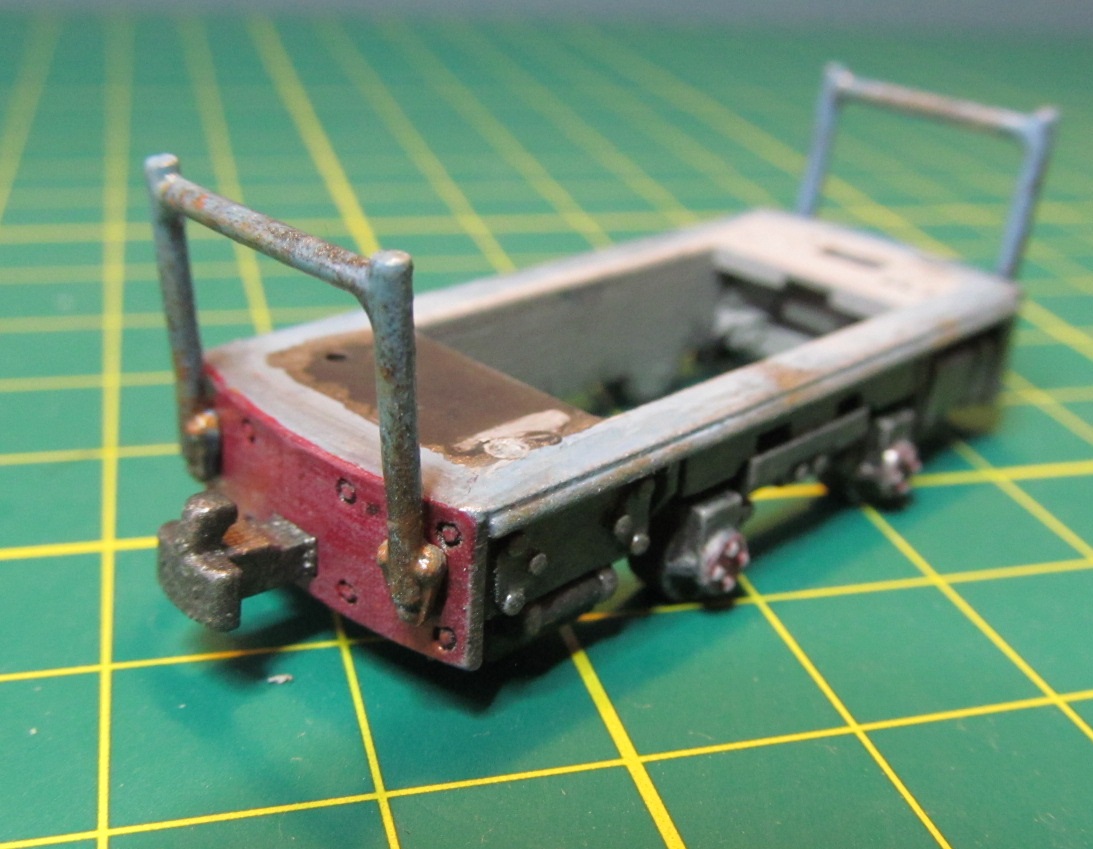
At this stage
it is time to separate all the detail parts from the main body and footplate of
the model. Most of the small parts will snap off the sprues with a genital push
or twist, as the base of the sprues are smaller and weaken to allow for this.
The main parts however are best cut from each other using a razor saw.
There may be a
little more cleaning up to do on these small parts now that they are accessible
all-round. Once this is done check that they all fitted into the corresponding
holes made for them on the body of the engine. The fiddly ones are the driver’s
seat and the brake handle column, for which I used small tweezers to hold the parts
while putting them in place.
The chassis was
tried in place next. I have allowed a little bit more clearance on this model
than some of my previous ones, so the chassis will seem loose. This is because
the Fine Detailed plastic is less flexible and would break if put under too
much pressure. The use of a small piece of Blu Tack at each end of the chassis
footplate will take this tolerance up.
 |
© 2018 David
Hurst All Rights Reserved
|
|
I found it easier
to paint the small detailed parts before fitting them to the model. It also
made the body and footplate much more accessible to paint in detail. I used
Revel 09 charcoal on the chassis and a light blue mix on the bodywork. The cab
interior had a thinned wash of a cream mix which included the brake column and
driver’s seat. The buffer beams and axle boxes had a wash of bright red over
the grey primer so that the grey showed through. I did not want the paint to
look new but worn. I added rust streaks down various parts of the body work,
from the corners of window and bonnet doors hinges and the radiator brackets. Soot
and grime were added using a black and brown thinned wash applied with a dry
brush, which helped to pick out areas like the side and front grills. Bare
metal and metal components were picked out with a mixture of dark grey and
silver (gunmetal). To finish the whole model was given a coat of satin varnish.
 |
© 2018 David
Hurst All Rights Reserved
|
|
The ballast was
added to the model wherever I could find space, some each end of the foot plate
and some centrally over the chassis. I could have but more in the front of the
body behind the radiator but that would make the model imbalanced.
 |
© 2018 David
Hurst All Rights Reserved
|
|
I found it
difficult to find a driver for this particular little engine because of the
seated and twisted position the figure would need to take. So I found a
suitable Dapold line side figure and adjusted its posture to seating with arms
out and head turned to the left. As these figures are on the tall side the loss
of a bit of height did not seem to look out of place.
 |
| ©
2018 David Hurst All Rights Reserved |
 |
© 2018 David
Hurst All Rights Reserved
|
|
If you would like a copy of this model it is available on Shapeways at Model Engine Works:
|